Seven Segment Board with ZDev
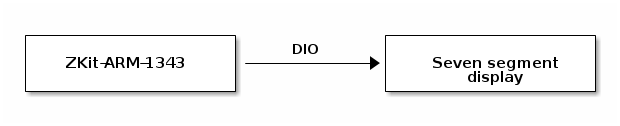
In this second article, in the Seven Segment series, we are going to discuss about, how to use Seven Segment Display Board with the ZDev. If you haven’t, you might want to read the seven segment fundamentals described in the blog article Seven Segment Board, Getting Started before reading this article.
Hardware
-
Seven Segment Display Board
-
ZKit-ARM-1343 Board
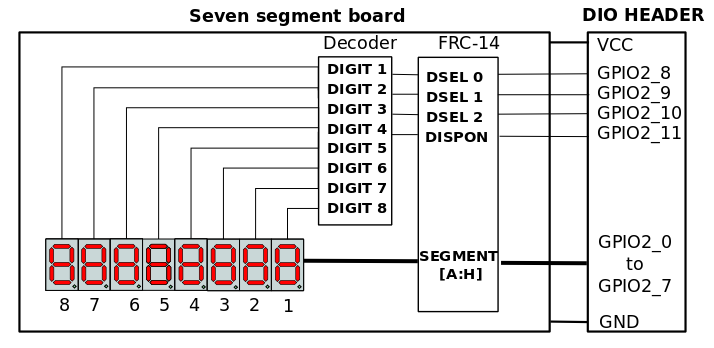
The following diagram illustrate hardware connection. 8 digit seven segment and ZKit-ARM-1343 connected through DIO port.
Seven segment connectivity
-
GPIO2_0 to GPIO2_7 : Drive the value to be displayed on a 7-segment.
-
GPIO2_8 to GPIO2_10 : Used to select the digit position.
-
GPIO2_11 : Used to entire display ON or OFF.
We need to configure this pins direction as output, then only we can drive the pins. Following software code will say, how to configuration this pins.
Software
#include <board.h>
#include <stdint.h>
#include <gpio.h>
#include <lcd.h>
#define ENCODE_DIGIT_LENGTH (sizeof(encode_digit) / sizeof(uint8_t))
uint8_t encode_digit[] = {
0x3F, /* 0 */
0x06, /* 1 */
0x5B, /* 2 */
0x4F, /* 3 */
0x66, /* 4 */
0x6D, /* 5 */
0x7D, /* 6 */
0x07, /* 7 */
0x7F, /* 8 */
0x67, /* 9 */
0x80 /* . */
};
/* Enable and set direction out of port 2 pins */
void sseg_init(void)
{
uint8_t i;
for (i = 0; i < 12 ; i++) {
gpio_enable_pin(GPIO2_0 + i);
gpio_direction_output((GPIO2_0 + i), 0);
}
}
/* Display decimal value in segment display */
void sseg_display(uint8_t number)
{
uint8_t temp = encode_digit[number];
gpio_set_pin(GPIO2_0, (temp >> 0) & 1);
gpio_set_pin(GPIO2_1, (temp >> 1) & 1);
gpio_set_pin(GPIO2_2, (temp >> 2) & 1);
gpio_set_pin(GPIO2_3, (temp >> 3) & 1);
gpio_set_pin(GPIO2_4, (temp >> 4) & 1);
gpio_set_pin(GPIO2_5, (temp >> 5) & 1);
gpio_set_pin(GPIO2_6, (temp >> 6) & 1);
gpio_set_pin(GPIO2_7, (temp >> 7) & 1);
}
/* Select a digit of the Seven Segment Board */
void select_segment(uint8_t segment)
{
gpio_set_pin(GPIO2_8, (segment >> 0) & 1);
gpio_set_pin(GPIO2_9, (segment >> 1) & 1);
gpio_set_pin(GPIO2_10, (segment >> 2) & 1);
}
/* Turn on the display */
void enable_sseg(void)
{
gpio_set_pin(GPIO2_11, 0);
}
/* Turn off the display */
void disable_sseg(void)
{
gpio_set_pin(GPIO2_11, 1);
}
int main()
{
uint8_t number;
uint8_t segment;
uint32_t i;
board_init();
gpio_init();
sseg_init(); /*  */
enable_sseg(); /*
*/
enable_sseg(); /*  */
number = 0;
while (1) {
sseg_display(number); /*
*/
number = 0;
while (1) {
sseg_display(number); /*  */
for (i = 0; i < 10000; i++) {
for (segment = 0; segment < 8; segment++) {
select_segment(segment); /*
*/
for (i = 0; i < 10000; i++) {
for (segment = 0; segment < 8; segment++) {
select_segment(segment); /*  */
}
}
number++;
number %= ENCODE_DIGIT_LENGTH;
}
}
*/
}
}
number++;
number %= ENCODE_DIGIT_LENGTH;
}
}
| Configure GPIO pins and set direction as output. | |
| Turn on display. | |
| Display decimal digit value in segment. | |
| Change 7-segment digit display 0 to 7. |
/static/code/sevenseg-zdev.c[Download Source File]
This code will continuously display decimal number 0 to 9 and dot
symbol in all 7-segment display with some time delay.
Credits
-
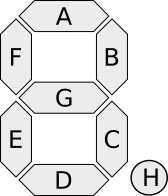
The Seven Segment Digit image is based on this Seven Segment image from Wikimedia Commons.