NuttX, Getting Started
NuttX is a small footprint Real-Time Operating System (RTOS) for microcontroller environments. NuttX provides a POSIX API, with a single process, multi-threaded environment. NuttX has been ported to various architecture including ARM, AVR, AVR32 and Zilog.
In this article, we will explore the file system, storage and networking capabilities, of NuttX. The article assumes that you are familiar with Linux, or any other Unix like operating system.
Nuttx Features
Some feature highlights of NuttX include:
-
Storage
-
MMC and SD card support
-
Flash support
-
USB Mass Storage support
-
-
Networking
-
TCP/IP stack
-
BSD socket API
-
DHCP server/client
-
FTP server/client
-
HTTP server/client
-
-
Filesystems
-
FAT filesystem support
-
Wear-leveling Flash filesystems
-
Network File System Client (NFS client)
-
ROM based filesystem support
-
-
Input
-
Touchscreen
-
USB Keyboard
-
Buttons (GPIO)
-
Keypads
-
-
Graphics
-
SPI based LCDs and OLEDs
-
Windowing system
-
Bitmap font rendering
-
GUI widget library
-
LM3S6965 Evaluation Kit and Qemu
We will need a target microcontroller board to try out NuttX. For this purpose we will emulate LM3S6965 Evaluation Kit using Qemu. Qemu is a system emulator that can emulate a wide range of processors and peripherals. For more information on Qemu, see http://en.wikipedia.org/wiki/QEMU
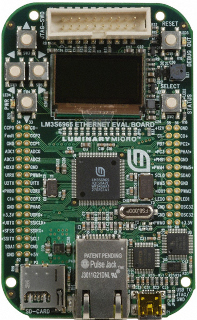
LM3S6965 is an ARM Cortex-M3 based microcontroller from TI’s Stellaris series. LM3S6965 has about 64KB on-chip RAM, and 256KB on-chip Flash. NuttX has been ported to this microcontroller, and specifically to the LM3S6965 Evaluation Kit. This makes it a great choice for trying out NuttX. The peripherals on the Evaluation Kit, support in Qemu and NuttX driver support, is tabulated below.
| Feature | Qemu Emulation | NuttX Driver |
|---|---|---|
Serial Port |
Yes |
Yes |
SD Card |
Read Only |
Yes |
Ethernet |
Yes |
Yes |
OLED Display |
Yes (Mostly) |
Yes |
Qemu version 0.14.0 or above is required to properly emulate the
LM3S6965 Evaluation Kit. Make sure you download and install Qemu on
your system. Qemu is part of most Linux distributions, so it is just a
matter of invoking apt-get or yum with the appropriate package
name. The instructions given in this tutorial correspond to Qemu
version 0.22.0.
Debian users, please note that the version of Qemu distributed with Squeeze does not meet the requirement mentioned above. So you might want to compile a more recent version of Qemu yourself.
NuttShell
NuttShell (nsh) is a NuttX application, that allows the user to exercise capabilities of Nuttx, interactively. NuttShell is similar to Unix shells and provides many common Unix commands. When NuttShell runs on the target board, is accepts commands through the serial console. The shell can also be accessed by connecting through telnet.
The NuttShell application built for the LM3S6965 Evaluation Kit is available for download from the link below. The NuttShell executable contains both the NuttX kernel and the NuttShell application. An SD Card image, containing some files is also provided for testing purposes.
-
/static/code/nuttx-nsh.elf[Download NuttShell for LM3S6965 Evaluation Kit]
-
/static/code/sd.img[Download SD Card Image]
NuttX on the Emulated Target Board
The target board can be emulated, and NuttX can be executed on the board using the following command.
$ qemu-system-arm -M lm3s6965evb \
                  -kernel nuttx-nsh.elf \
                  -net user,hostfwd=tcp:127.0.0.1:2300-10.0.2.15:23 \
                  -net nic,model=stellaris \
                  -sd sd.img
The -M lm3s6965evb option specifies the machine to be emulated, as
LM3S6965 Evaluation Kit. The -kernel nuttx-nsh.elf option specifies
the NuttShell application, is to be executed.
The target board is statically assigned an IP of 10.0.2.15, while compiling NuttShell. We will be using Qemu’s user mode networking capabilities to allow the target board to access the external network. For more details on user-mode networking, see http://en.wikibooks.org/wiki/QEMU/Networking
The -net user,hostfwd=tcp:127.0.0.1:2300-10.0.2.15:23 option
specifies user mode networking, with host port 2300 forwarded to guest
port 23. This is done to allow connecting to the telnet server
listening on port 23, in the guest. . The -net nic,model=stellaris
option specifies that the Stellaris Ethernet controller, is the
network interface card.
The -sd sd.img option specifies the image for the SD Card.
When Qemu starts up, the Qemu window by default shows the LCD display
of LM3S6965 Evaluation Kit. Switch to the serial console using
Alt-Ctrl-3 key combination. The NSH prompt should shown below should
be visible on the serial console.
NuttShell (NSH) NuttX-6.24
nsh>
Looking Around
The traditional ls command is available for listing files. Listing
files shows a single /dev folder in the root filesystem. The /dev
folder in turn contains a bunch of device files.
nsh> ls
/:
 dev/
nsh> ls dev
/dev:
 console
 mmcsd0
 null
 ttyS0
The ps command is available for listing the tasks running in the
system.
nsh> ps
PID   PRI SCHD TYPE   NP STATE    NAME
    0   0 FIFO KTHREAD   READY    Idle Task()
    1 100 FIFO TASK      RUNNING  <noname>()
    2 100 FIFO TASK      WAITSEM  <noname>()
The ps command shows an Idle Task and two other task. One of them
probably corresponds to NSH and other the telnet server.
The help command, provides a list of commands available.
nsh> help
help usage:  help [-v] [<cmd>]

  [           exec        ifup        mkrd        pwd         unset
  ?           exit        kill        mh          rm          usleep
  cat         free        losetup     mount       rmdir       wget
  cd          get         ls          mv          set         xd
  cp          help        mb          mw          sh
  dd          hexdump     mkdir       ping        sleep
  df          ifconfig    mkfatfs     ps          test
  echo        ifdown      mkfifo      put         umount
Mounting a Ramdisk
The root filesystem is a virtual filesystem, just like /proc in
Unix. And hence the filesystem is read-only. A ramdisk can be mounted
to get access to a read/write filesystem. A ramdisk can be created
using mkrd command.
The following command sequence creates a ramdisk, mounts it and creates file on it.
nsh> mkrd 40
nsh> mkfatfs /dev/ram0
nsh> mount -t vfat /dev/ram0 /tmp
nsh> echo "Hello World" > /tmp/hello.txt
nsh> ls /tmp
/tmp:
 HELLO.TXT
nsh> cat /tmp/hello.txt
Hello World
mkrd command is used to create a ramdisk. The argument specifies the
size of the ramdisk in sectors. Once a ramdisk is created a device
file /dev/ram0 becomes available. A filesystem can then be created
and mounted. Note that the mount point /tmp, in this case, is
automatically created by NuttX.
Accessing the SD Card
The SD Card can be accessed by mounting the block device
/dev/mmcsd0. The following command sequence mounts the SD Card and
prints the contents of a test file in the SD card. Note that, the SD
Card image sd.img provided to Qemu is used for the contents of the
SD Card.
nsh> mount -t vfat /dev/mmcsd0 /sd
nsh> ls /sd
/sd:
 TEST.TXT
nsh> cat /sd/test.txt
Hello World
Networking
As with any other Unix system, the active network interfaces can be
listed using the ifconfig command.
nsh> ifconfig
eth0    HWaddr 00:e0:de:ad:be:ef at UP
        IPaddr:10.0.2.15 DRaddr:10.0.2.2 Mask:255.255.255.0

uIP         IP   TCP  UDP  ICMP
Received    0000 0000 0000 0000
Dropped     0000 0000 0000 0000
  IP        VHL: 0000 HBL: 0000
            LBL: 0000 Frg: 0000
  Checksum  0000 0000 0000 ----
  TCP       ACK: 0000 SYN: 0000
            RST: 0000 0000
  Type      0000 ---- ---- 0000
Sent        ---- 0000 0000 0000
  Rexmit    ---- 0000 ---- ----
Connectivity to the gateway can be tested using the ping
command. Note that, since we are using user-mode networking, ping
systems on the external network will not work.
nsh> ping 10.0.2.2
PING 10.0.2.2 56 bytes of data
56 bytes from 10.0.2.2: icmp_seq=2 time=0 ms
56 bytes from 10.0.2.2: icmp_seq=3 time=0 ms
56 bytes from 10.0.2.2: icmp_seq=4 time=0 ms
56 bytes from 10.0.2.2: icmp_seq=5 time=0 ms
56 bytes from 10.0.2.2: icmp_seq=6 time=0 ms
56 bytes from 10.0.2.2: icmp_seq=7 time=0 ms
56 bytes from 10.0.2.2: icmp_seq=8 time=0 ms
56 bytes from 10.0.2.2: icmp_seq=9 time=0 ms
56 bytes from 10.0.2.2: icmp_seq=10 time=0 ms
10 packets transmitted, 9 received, 10% packet loss, time 11130 ms
The NSH can be accessed through telnet as well. Telnet to the host
port 2300, since guest port 23 has been forwarded to host port
2300. You should get the NSH prompt.
$ telnet localhost 2300
Trying 127.0.0.1...
Connected to localhost.
Escape character is '^]'.

NuttShell (NSH) NuttX-6.24
nsh>
NSH has TFTP get and put commands, and HTTP wget command. But we
weren’t able to get this to work yet.
Concluding Notes
It’s amazing to see how much can be packed into a code size of just 94K! Hope this article has kindled your interest in NuttX. We will see how to build NuttX + NSH application, in a follow-up article.
Get in touch with us at sales@zilogic.com for commercial NuttX related services.