Creating GLCD Bitmaps using GIMP
The ZKit-51-V664 has a Graphics LCD, that can be used for displaying GUIs, bitmaps, animations, etc. Bitmaps can be easily displayed on the Graphics LCD using the APIs provided by ZDev library. This article shows how to create bitmaps using GIMP, and how to display them on the Graphics LCD.
Packed Pixel Format
The Graphics LCD has 128x64 pixels. Each pixel can be turned either on or off. And hence only on 1 bit is required to represent each pixel. Images for such displays are generally stored in packed format, i.e. 8 consecutive pixels are packed into one byte. Such images are said to be 1 bit per pixel (bpp), packed pixel bitmaps. An example of such a bitmap is shown below.
/*
 * Mushroom icon in a 16x16 1-bpp packed bitmap.
 */
const unsigned char bitmap[] = {
        /* Row Bytes   0      7 0      7 */
        0xf0, 0x07, /* ....#### ###..... */
        0xf8, 0x0f, /* ...##### ####.... */
        0xac, 0x18, /* ..##.#.# ...##... */
        0x56, 0x30, /* .##.#.#. ....##.. */
        0xab, 0x68, /* ##.#.#.# ...#.##. */
        0x47, 0x75, /* ###...#. #.#.###. */
        0x83, 0x6a, /* ##.....# .#.#.##. */
        0xfd, 0x5f, /* #.###### #####.#. */
        0xff, 0x7f, /* ######## #######. */
        0x2e, 0x38, /* .###.#.. ...###.. */
        0x9c, 0x18, /* ..###..# ...##... */
        0x2c, 0x18, /* ..##.#.. ...##... */
        0x9c, 0x18, /* ..###..# ...##... */
        0x2c, 0x18, /* ..##.#.. ...##... */
        0xf8, 0x0f, /* ...##### ####.... */
        0xf0, 0x07  /* ....#### ###..... */
};
This bitmap can be displayed on the Graphics LCD using the following code fragment.
        gfx_init();
        gfx_clear();

        /* Display the bitmap at location 0, 0 on the LCD. */
        gfx_blit_bmp(0, 0, bitmap, 16, 16);
        gfx_update();
The gfx_blit_bmp() accepts the location on the LCD to draw the
bitmap, the bitmap to be drawn, and the size of the bitmap as
arguments.
Creating the Bitmap using GIMP
Small bitmap images can be easily created by hand. But for larger images, it would be better if there were a bitmap editor. There are two things to consider here:
-
Editing tool
-
File format
The open souce source image editing tool, GIMP, can be used for a wide variety of image editing purposes, including editing 1-bpp images. GIMP can be obtained from http://www.gimp.org.
The editing tool should save the file in a format that is convenient
for us to use in our program. The XBM file format is a format used by
the X window system for storing mouse cursor and other bitmap
images. The best part of XBM format, is that it stores the bitmap as a
C array, exactly as required by gfx_blit_bmp()!
The steps to create a 16x16 bitmap file using GIMP is shown below.
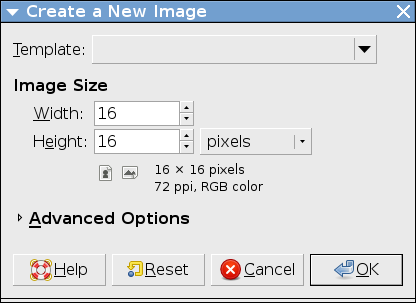
Start GIMP, and select File > New. In the Create a New Image dialog, specify the width as 16 and height as 16. Click on OK.
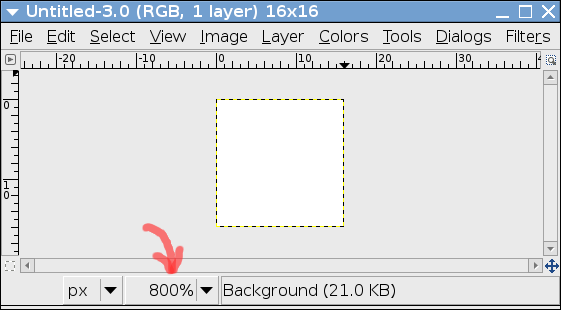
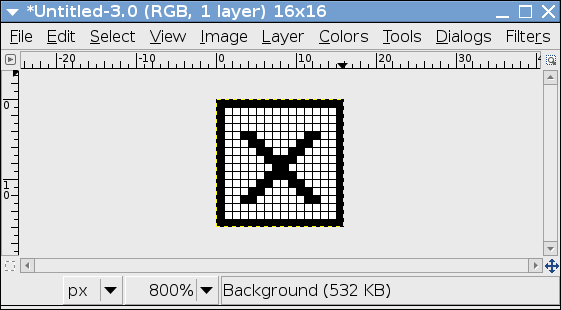
In the image window set the zoom level to 800%, so that the image is easier to edit pixel by pixel.
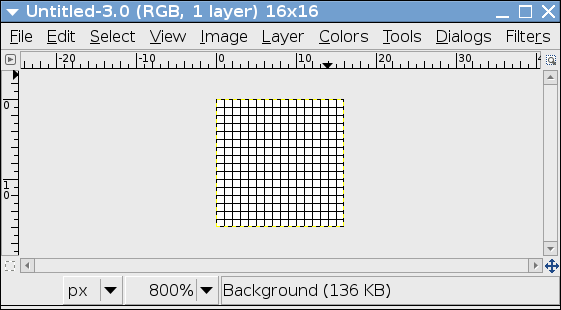
From the View menu, enable Show Grid. This will display the grid, so that each pixel is clearly visible. This again helps when editing individual pixels.
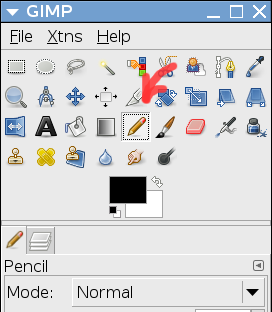
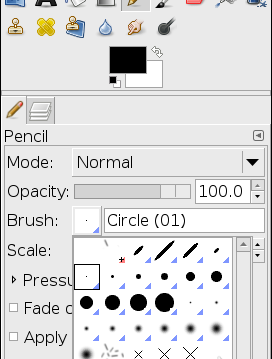
Select the Pencil tool from the tools window. Select a 1-pixel brush from the Pencil tool options. In this configuration, the Pencil tool allows individual pixel to be modified.
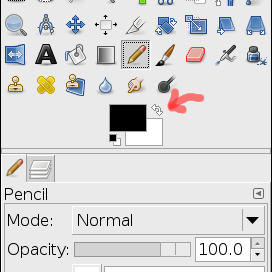
Draw your bitmap using the Pencil tool. The color be switched between black and white by clicking on switch icon on the tool window.
Save your image with the extension .xbm. Open up the .xbm file in
your editor, you should see a C array, containing the bitmap data.
#define check_width 16
#define check_height 16
static unsigned char check_bits[] = {
   0xff, 0xff, 0x01, 0x80, 0x01, 0x80, 0x01, 0x80, 0x19, 0x98, 0x31, 0x8c,
   0x61, 0x86, 0xc1, 0x83, 0x81, 0x81, 0xc1, 0x83, 0x61, 0x86, 0x31, 0x8c,
   0x19, 0x98, 0x01, 0x80, 0x01, 0x80, 0xff, 0xff };
Copy the C array into your program and pass it on to
gfx_blit_bmp().
Conclusion
Creating large bitmaps by hand is not a trivial job. This article has shown, how GIMP and the XBM format simplifies the job of creating large bitmap images.
Get in touch with us at sales@zilogic.com for commercial Embedded Linux related services.