Building NuttX
This article is a follow-up of the NuttX, Getting Started article. In the previous article we demonstrated NuttX, using the NuttShell application. In this article we will see how to build NuttX and NuttX applications from source.
Getting the Toolchain
A cross-compiler toolchain is required to build NuttX. We will use the GNU compiler toolchain distributed by CodeSourcery, now acquired by Mentor Graphics. Visit Mentor Graphics website to download and install the ARM EABI toolchain.
Getting NuttX Source Code
Create a folder called nuttx-dev for NuttX development.
$ mkdir nuttx-dev
Download the following files from the
NuttX
SourceForge Download page, to the nuttx-dev folder.
-
nuttx-6.24.tar.gz- contains NuttX RTOS -
apps-6.24.tar.gz- contains sample applications
Extract the tar balls as shown below. nuttx and apps folder should
be inside the same directory, in our case nuttx-dev.
$ tar --gunzip -x -f nuttx-6.24.tar.gz
$ tar --gunzip -x -f apps-6.24.tar.gz
$ mv nuttx-6.24 nuttx
$ mv apps-6.24 apps
NuttX support various microcontrollers and boards, so before building
NuttX, the specific target board has to be selected. For each
supported target board a folder is available under nuttx/configs.
$ ls nuttx/configs
amber            kwikstik-k40        olimex-lpc1766stk  stm3210e-eval
avr32dev1        lincoln60           olimex-lpc2378     stm3220g-eval
c5471evm         lm3s6432-s2e        olimex-stm32-p107  stm3240g-eval
cloudctrl        lm3s6965-ek         olimex-strp711     stm32f100rc_generic
compal_e88       lm3s8962-ek         p112               stm32f4discovery
... clipped ...
The folder lm3s6965-ek corresponds to our target board. Within each
board folder, board specific code is located within src. Pre-canned
NuttX configurations to run test applications is available under the
following sub-folders.
-
nsh- NuttShell application -
nx- graphics demo -
ostest- operating system test
Configurations specify what features of NuttX are to be enabled, and
additional paramaters for the test application. NuttX can be built for
a specific test application by selecting one of the above pre-canned
configurations. A script called configure.sh is available for this
purpose, under nuttx/tools. The script has to be invoked with the
board name and test application name as argument, as shown below.
$ pushd nuttx/tools
$ ./configure.sh lm3s6965-ek/nx
$ popd
The above commands chooses the graphics demo application nx, to be
run on the LM3S6965-EK evaluation board. While invoking make, we
will have to tell NuttX to use the CodeSourcery toolchain, by setting
CONFIG_LM3S_CODESOURCERYL to y, and disable the Buildroot
toolchain, by setting CONFIG_LM3S_BUILDROOT to n. NuttX is now
ready to be compiled. Invoke make, to build NuttX for the selected
target board + application.
$ pushd nuttx
$ make CONFIG_LM3S_CODESOURCERYL=y CONFIG_LM3S_BUILDROOT=n
$ popd
The file nuttx/nuttx contains the kernel and the application, in ELF
format, and nuttx/nuttx.bin in binary format suitable for flashing
to a microcontroller board.
Running in Qemu
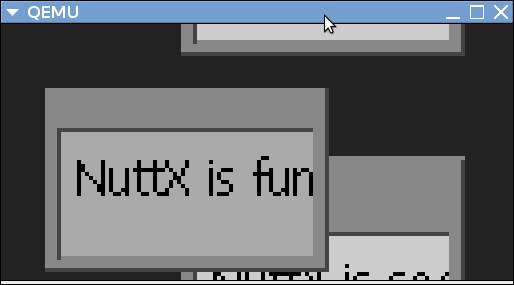
Just as in the previous article, we invoke Qemu as shown below to run the graphics demo in NuttX.
$ qemu-system-arm -M lm3s6965evb -kernel nuttx/nuttx
You should the graphics demo application running on the emulated LCD display. A screenshot is shown below.
Building NuttShell
We will next try to build NuttShell. This is a bit involved, since some of the emulated hardware does not behave close enough to the real hardware. You will need to patch NuttX to work around these emulation quirks.
The first hunk corresponds to the Ethernet link up. NuttX reads the Ethernet PHY register, to identify the link status. The emulation does not seem to report the link status correctly. So we disable the link checking, and assume that the link is always up, in the emulation.
The second hunk corresponds to network related settings. The telnet
server related configuration were missed out in the NSH configuration
file, probably due to bit rot. The IP address of the target is changed
to 10.0.2.15 and the gateway IP to 10.0.2.2, this corresponds to
default IPs within Qemu.
The third hunk corresponds to the SD Card. The emulation only support
SD Card 1.0 specification, but does not respond correctly to CMD8,
which is used to identify whether SD Card 2.0 specification is
supported. We disable this check and assume that only 1.0
specification is supported by the card.
Download the patch, apply it patch to the NuttX source tree, as show below.
-
static/code/lm3s6965-qemu-nuttx.patch[Download the NuttShell Patch]
$ pushd nuttx
$ patch -p1 < /path/to/patch
$ popd nuttx
Configure the source tree for lm36965-ek/nsh just as before and
rebuild. This should build NuttX with the NuttShell
application. Execute the application in the target using the following
command. Make sure you copy sd.img to nuttx-dev folder.
$ qemu-system-arm -M lm3s6965evb \
                  -kernel nuttx/nuttx \
                  -net user,hostfwd=tcp:127.0.0.1:2300-10.0.2.15:23 \
                  -net nic,model=stellaris \
                  -sd sd.img
Concluding Notes
Building NuttX from source is pretty straight forward, once you are familiar with source tree and its organization. Hope this article has helped to shed light on these areas. In the next article in this series, we will get our hands dirty and will start writing our own NuttX applications.